Have you ever gotten an idea on how to make something and become so excited about it, that you went straight home after the gym and started, only breaking when your "time to go and get the oldest from school" timer goes off, and you rush out the door with your toddler only to get there and realize that you still have your gym clothes on.... Yeah, me neither :P Until this bib.
I've been making baby tie onesies for a while, and love them. But, I wanted something a little different. I also just got a new silhouette cameo machine, which inspired me to clean out my craft section and discover all the scraps I had and needed to start using if I want to buy more, and actually have room for it.
As I created, I took pictures.
If you want this in just 13 super easy steps:

you'll need to start out with the following materials:
* Bib you love the shape of
* Material for the front (amount will depend on the size you're making, but a fat quarter should be plenty, for this project, I used cotton)
* Material for the back (same amount as for the front, I used minky for this, but terry or chenille or towel just hanging out would be great too!)
* Coordinating Fabric for the tie (like an 1/8 of a yard will make a couple, this is a perfect scrap opportunity. For this, I used fleece, but cotton would be great too)
* Velcro (or snaps)
* Heat'n Bond (or something similar)
* Sewing machine and basic notions (thread, pins and so on)
* A tie template cut out of cardstock (I free handed my design, then folded it in half to shape it so it was even on both sides)
Step One: Take your material, layer it right side together and pin your bib template on top of it. Minky can be a tricky little stinker, so be sure that you use plenty of pins so it doesn't shift on you. You might notice that my top piece is two pieces sewn together. I really wanted to to use this fabric and while it was pretty wide enough, it wasn't tall enough. So, I sewed them together and then arranged the top of the bib "template" to where the straps would start.

Step Two: Now that they are pinned nice and securely together, cut out your fabric. Add about 1/4" to the entire design to give yourself a seam allowance.

Step Three. It's all cut out! Yay! Remove the pins and admire the hardest part (in my opinion) of the whole project.

Step Four: Now it's time to separate the pieces and add your velcro. Remember that the pieces are going to be opposite once they are sewn together. So, attach your velcro to what looks like the same side of each of the pieces.

Step 5: Sew the velcro to your front and back pieces.


Step 6: Now we start my favorite part! Making the tie. The first part of this is to iron your heat'n bond to your tie material.

Step 7: Lay your awesome tie pattern piece on top of the heat'n bond material side and trace it before cutting it out.


Step 8: Admire your awesome tie and lay it on top of your bib. Adjust it so it looks how you like it. I like to tuck the bottom under the top just slightly. Also, when you iron it on, be sure to take into consideration your seam allowances. I ironed mine on about 1/2" under the top center. I also eyeballed it. If you want it perfect, fold the top of your bib in half vertically and and iron it to find your center to put your tie on the center.

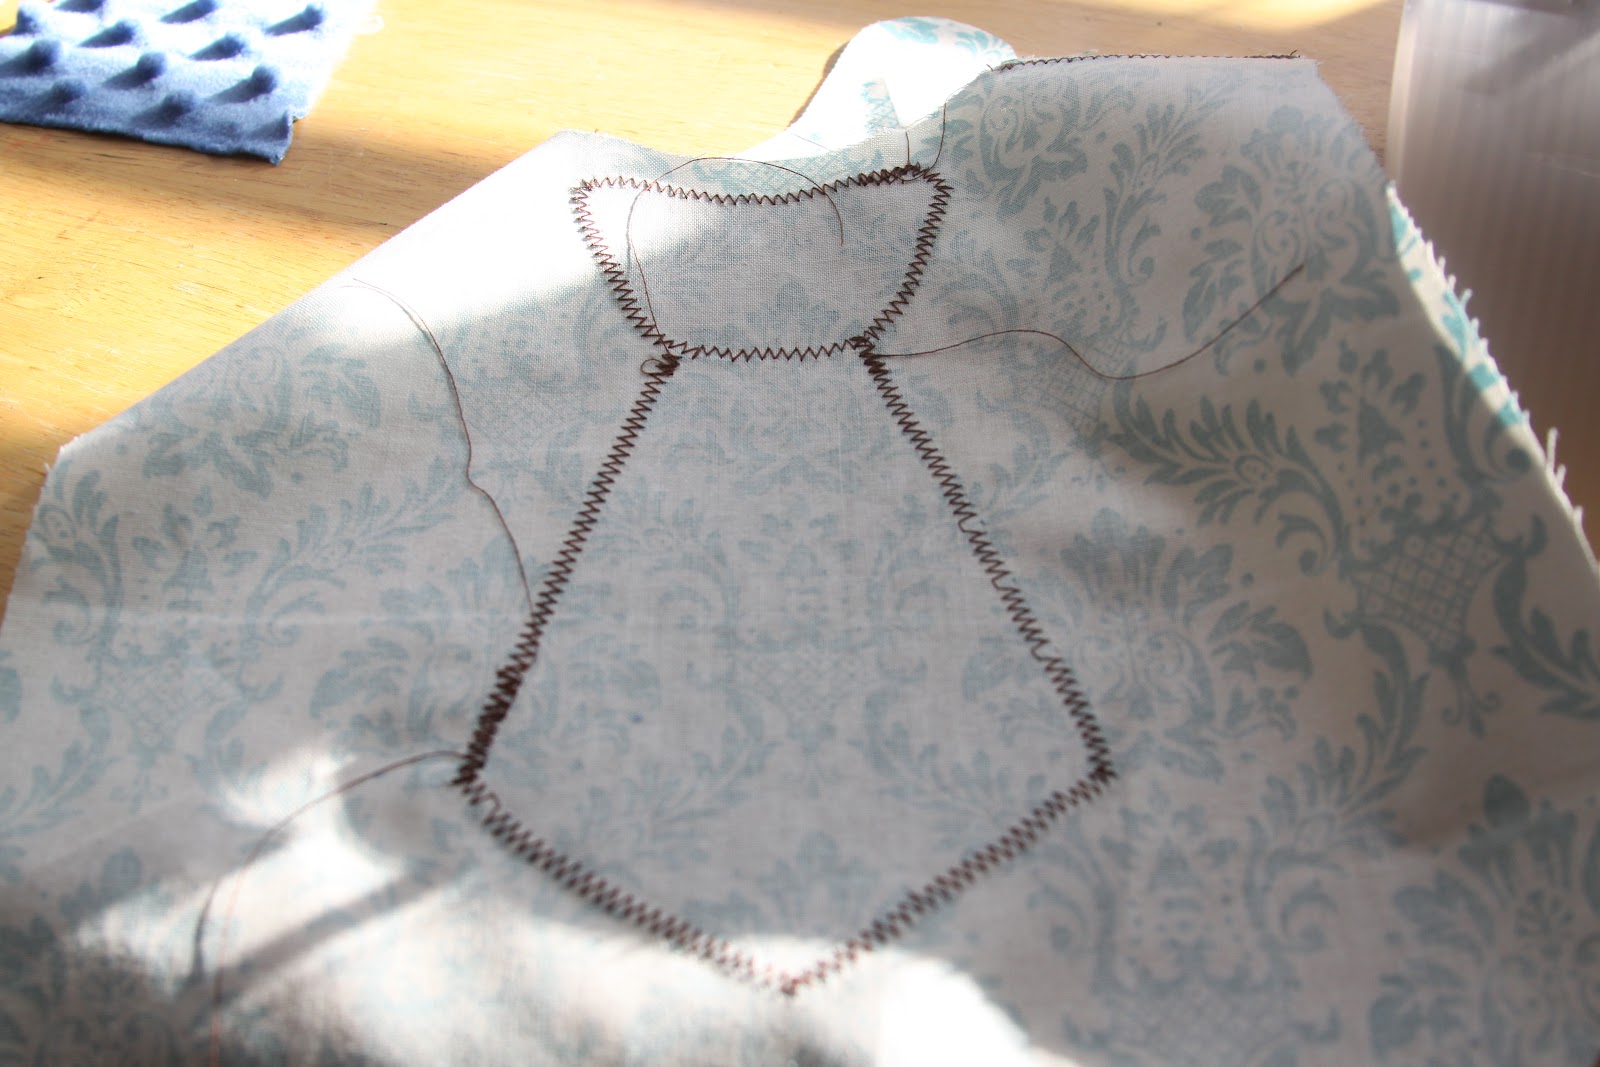
Step 9: Take your awesome bib over to your trusty sewing machine. Using a zig zag stitch, permanently adhere your tie to your bib. I used to hate appliqueing. Then, I learned to sloooooooow my machine down. It isn't a race, if you go slow, your machine won't get confused and skip stitches, plus it'll be easier to stay straight and look nice.


This is how the back of your tie may look. As you can see, I tried rushing in some places and ended up having some stitches get skipped that I had to go back and fix.
Step 10: Trim your threads and then pin your front and back pieces together. You will want to be sure that you leave an opening to be able to turn your bib right side out. To do this, I use two pins close together to scream "Hey, stop sewing!" at me.


Step 11: Sew all the way around, leaving your opening open.

Step 12: Turn your bib right side out through the opening. To help turn the corners and push all the pieces out, grab a chopstick and push it through. Once you do that, pin the opening closed and top stitch your bib. I did 1/4" seam for the top stitch.


Step 13: Admire your handy work. Find a cute little neck to wrap it around :)

Enjoy!


No comments:
Post a Comment